Post Content
In my blog posts, I have elaborately discussed different podcasting topics, from content creation, monetization to podcasting setup. I have tried to guide you on basic things that bother a beginner like choosing the right topic. And stuff that concerns an established podcaster, like monetization. Each time I have highlighted that quality content and engagement with the audience is a podcaster’s key to success.
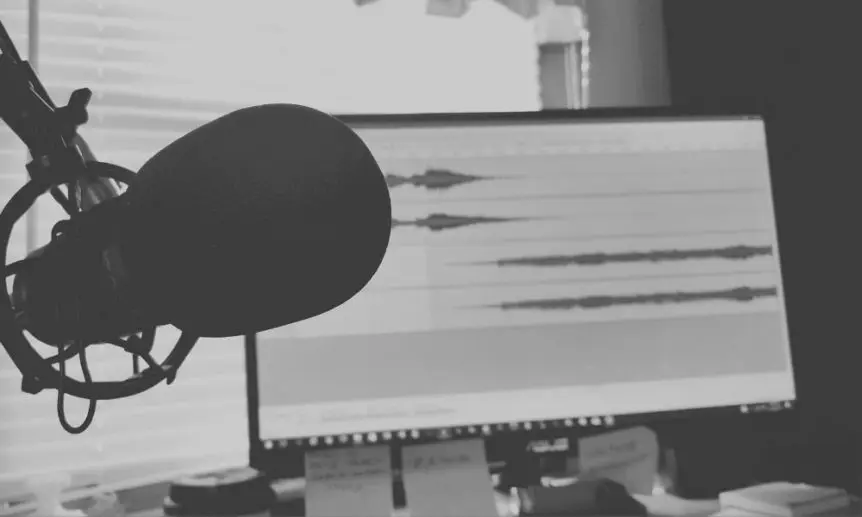
However, now I wish to touch on a slightly different topic – achieving an outstanding sound quality. The quality of your recorded sound is equally important as your content for your podcast to become popular.
In this post, I will recommend three podcasting equipment setups with which you can get a high-quality recording for your podcast.
Based on how far you have come along in your Podcasting pursuit, or how committed you are to the long-term success, I recommend three equipment setups that will ensure a rich and clear recorded sound.
Before we go further here are some other guides that will help to improve your audio quality
- Home Soundproofing Guide – permanently stop all the outside noises,
- Podcasting Remotely Tips – read this if you can’t permanently soundproof your studio
- Vocal Tips – change the way you prepare for recordings to sound your best

Best Basic Podcasting Setup – full gear below $300
This best basic starting podcasting setup requires just 4 gear components and is extremely easy to use. You can put it together for around or even below $300.
- Mic: Audio Technica AT2020 USB Plus or Blue Yeti X
- Pop-filter: Double-layer pop filter
- Monitor Headphones: Sennheiser HD280 PRO
- DAW: Audacity or GarageBand
If you are a beginner who wants to invest in an equipment setup to start Podcasting, I would suggest something that doesn’t drain your bank account and doesn’t compromise the quality as well.
Mic: Audio Technica AT2020 USB Plus or Blue Yeti X
These are two reasonably priced microphones. Let us make a quick comparison between them. Both the microphones have a plug-and-play setup.

The Audio Technica is a condenser mic with a sleek and elegant design. It has a second layer in addition to the wire mesh, which does a great job of eliminating noise. AT 2020 supports Cardioid polar pattern, and it is compatible with both Windows and Mac. It is a good choice for Apple users, as very few microphones are compatible with Apple.

The Blue Yeti X is a condenser mic that has a retro look, and the microphone’s height allows you to record without bending over. Blue Yeti works with four polar patterns which are Cardioid, Omnidirectional, Bi-directional, and Stereo. This gives it an advantage over Audio Technica. Blue Yeti also comes with a mute button, which is useful for taking quick pauses in between recordings.
Pop-filter: Double-layer pop filter

For the uninitiated, let me first explain what a vocal pop is. It is a popping or snapping noise that can ruin your recording, and it occurs when you record ‘B’ or ‘P’ sound into a traditional microphone.
A pop filter acts as a shield between you and the microphone and breaks down sound to prevent vocal pops. Vocal pops can sound very distracting during your Podcast episode, so remember to include a double layer pop filter to achieve a smooth sound.
Headphones: Sennheiser HD280 PRO

Headphones allow you to monitor your recording for static, loudness, or any other complexity that might occur while you are recording your Podcast. The Sennheiser HD280 PRO is an around the ear headphone with a collapsible design and swiveling ear cups. Use it to achieve a high ambient noise attenuation, along with an accurate, linear sound reproduction.
DAW: Audacity or GarageBand

You need a Digital Audio Workstation or DAW for recording, editing, and mixing sounds. As a beginner, you need to edit clips and adjust levels. So you should go for either Audacity or GarageBand for your Podcast.
Both of them are available for free. If you just want to record your voice and add a few effects, go for Audacity. If you want loop features and want to add images file to your podcast, or use vocal presets, you should choose GarageBand.
Here you can find our detailed Audacity review.

Intermediate Podcasting Setup – full gear below $600
This best intermediate podcasting setup requires just 8 gear components. For a reasonable price of below $600 you will get good sound quality and ease of use.
- Mic: Rode NT1-A
- Microphone Boom: Rode PSA1 swivel
- Shock Mount: Rode PSM1
- Pop-filter: Double-layer pop filter
- Cable: Mogami Silver XLR
- Audio Interface: Focusrite 2i2 3rd generation
- Monitor Headphones: Sennheiser HD280 PRO
- DAW: Reaper or Hindenburg Journalist Pro
If you have already gained some experience and popularity as a podcaster, or you can utilize your sound equipment for purposes other than podcasting, then investing in a set up with greater capabilities is justified.
Mic: Rode NT1-A

This best-seller condenser microphone does a great job of picking up low sounds. This makes it ideal for a quiet recording studio. It has a cardioid recording pattern. It has a flat frequency response, which allows you to record sound, which is quite true to life.
Rode NT1-A is known for its clear and neutral sound. It has a sensitive, large diaphragm. It is a preferable solution if you want to record higher-quality sounds.
Microphone Boom: Rode PSA1 swivel

It is a highly adjustable microphone stand. You may use the Rode PSA1 swivel with your Rode microphone to achieve 360-degree rotation while recording your podcast.
Shock Mount: Rode PSM1
Use this Rode shock mount along with your Rode mic and Rode mic boom to gain isolation from external vibrations. It is a sturdy shock mount with good de-coupling.
Pop-filter: Double-layer pop filter
As the setup has a microphone with high sensitivity, you must necessarily use a pop filter to eliminate those distracting vocal pops from your podcast.
Cable: Mogami Silver XLR

The Mogami Silver XLR cable comes at an economical price but delivers great quality results. Many users have also said that it has helped them eliminate popping sounds from their recordings.
It has 2 conductors, silver-plated connectors, and an excellent 23 AWG resistance.
Audio Interface: Focusrite Scarlett 2i2

Focusrite has been the world’s best-selling audio interface. It provides six interfaces and extra line-ins (as compared to the previous versions). Focusrite Scarlett 2i2 also has Direct Monitor’ buttons with which you can switch and control ‘mono’ and ‘stereo’ summing. You can also use the air Button to activate an emulation of the classic ISA mic preamps.
It allows you to record the sample rate at 192kHz/24-bit what is exactly what we are looking for in podcast recording equipment.
Monitor Headphones: Sennheiser HD280 PRO
Let your ears pick up those minor sounds with the extended frequency response of Sennheiser headphones. The frequency range of those headphones is an impressive range of 8Hz – 25kHz.
Additionally, Sennheiser promises 32 dBA ambient noise reduction, which allows you to hear your show more clearly.
DAW: Reaper or Hindenburg Journalist Pro
Once you become technologically sound, it’s time to upgrade your Digital Audio Workstation. For a medium-scale setup, I recommend Reaper or Hindenburg.

Reaper is an advanced yet easy-to-use customizable software, and there are plenty of online tutorials available that can help you become a pro with Reaper. It has a wide range of editing and processing tools that will be a boon for making a high-quality podcast episode. Read a detailed review.

The Hindenburg Journalist Pro is ideal for podcasters and journalists. It has fantastic features which are easy to use. For example, you can automatically adjust the gains of imported clips. And you can easily record from multiple interfaces natively, thus eliminating the need for aggregate devices. Check our detailed review.

Pro Podcasting Setup – full gear below $1000
This pro podcasting setup requires 8 gear components. At $1000 it will give you a studio sound quality and make your show stand out.
- Mic: Shure SM7B with windscreen
- Microphone Boom: K&M Boom 21090
- Isolation Shield
- Cables: Mogami Gold XLR
- Audio Interface: Focusrite 2i2 3rd generation
- Mic Activator: Cloudlifter CL-1
- Monitor Headphones: Sony MDR-7506
- DAW: Adobe Audition
If you have already graduated from being an amateur Podcaster to a professional, and you don’t mind shelling out a larger amount, then consider this equipment for advanced setup. These instruments are fantastic if you are ready (in terms of your progress and finances) to go ahead with a high-end recording studio.
Mic: Shure SM7B with windscreen

The Shure SM7B earned a lot of fame in the recording world when Michael Jackson recorded his album Thriller on it. It is a dynamic microphone that works on a cardioid pattern. It is a premium, broadcast standard microphone. If you are a professional Podcaster who is all geared up for live Podcasting, this is the microphone that deserves to be in your studio.
Read a full review of this astounding microphone: Shure SM7B review and detailed specs
Microphone Boom: K&M Boom 21090

The K&M Boom is a sturdy stand for supporting your mic. With its 2 pieces telescopic and T-Bar locking adjusting screw, be assured that your microphone will stay fixed at the desired position.
Isolation Shield

The Shure SM7B has an in-built pop filter, so an isolation shield will be enough to eliminate unwanted sounds.
Cables: Mogami Gold XLR

The Mogami Gold XLR is an ideal choice for achieving high quality digital and analog recording. In this more advanced setup, you will need two of these, one for connecting the mic to the Cloudlifter, and another to connect the Cloudlifter to an interface.
Audio Interface: Focusrite Scarlett 2i2
It is the best audio interface for Shure SM7B, and it boasts of sample rates of up to 24 bits/ 192 kHz.
Mic Activator: Cloudlifter CL-1

As the Shure SM7B is a low output mic, you need to use a mic activator to get sufficient gain. Use a Cloudlifter CL-1, which goes well with the smooth sound and thickening characteristic of the mic. It will provide an additional 25 dB additional gain, much required by Shure SM7B.
Monitor Headphones: Sony MDR-7506

The Sony MDR-7506 is a favorite among audio professionals. They are the best choice for reference headphones as they allow you to hear the nuances in sound very clearly while you record your Podcast. The comfort and fit are great for wearing headphones for long periods.
DAW: Adobe Audition

The Adobe Audition is a premium DAW for which you have to pay a monthly subscription fee. It has several features that make it worth the price and hype. For instance, with the Adobe Audition, you may record multiple tracks with separate microphones simultaneously, and set gain levels for each person’s voice. Later, you can process them separately in post-production.
It has a fantastic noise reduction feature, which is great for removing that minor hiss from your podcast. The Essential Sound panel makes it easier to add effects to the sound. Adobe Audition is our favorite audio editing software – check here our detailed review.
Recommender podcasting equipment alternatives at different prices points
If you want to read more about specs of the podcasting gear mentioned in the above recommendations, or if you simply want to explore more podcasting setup options, check those detailed reviews.
- Podcasting microphones – our review of best USB, condenser and dynamic mic,
- Audio interfaces – detailed buyers guide and explanation of essential features of an audio interface,
- Monitor headphones – review of best quality monitor headphones for every setup,
- XLR and USB cables – must-have upgrades for each podcasting pro studio.
Summary
Good podcasting set up to start a show needs to be built of high-quality equipment and solutions. When making a decision focus on:
- Sound quality – if you approach podcasting seriously we don’t compromise on sound quality
- Quality to price – you should choose the best price point suitable for making a podcast. There is no need to overinvest in capabilities required only for music recording
- Reliability and build to last – you need to focus on your content and not constantly second-guessing the performance of your audio setup. Buy only things that you will be able to use for many years without the need to upgrade and replace.
Don’t let the poor sound and noise disruptions ruin your efforts. Choose a setup that best suits your needs, your recording environment, and of course, your budget and lets you impress your listeners with your work!
What is your favorite podcasting gear?
Comments 2
That will certainly be helpful in the current situation. Thanks!
Great short guide! You really helped me put together the best podcasting setup under $300!